Crepes! Crepes! Crepes! Recipe 

The first crepe I can remember eating was in San Francisco as a young teenager. Since then the only food labeled crepes I had were those I made myself. I had been blessed with having German pancakes my Opa and Mom made me during my lifetime that were basically the same thing but I had never learned their recipes. Looking for German pancakes online led me to what we always called: “Dutch baby.” Another family favorite. I decided to stay with this crepe recipe. I love how versatile they are. They can be made sweet, sour, salty or savory or some kind of blend of all. Filled with anything from jam to bacon bits to fresh fruit or custard or whipped cream. They are even delicious just with a little butter. My toddler loves them plain and ran off with pieces as soon as I finished cooking them! 

You will need: 

*2 tbsp sugar (white or raw have both worked for me)

*2 eggs 

*2 cups of milk (I used one cup plain kefir with one cup cashew so alternatives things work well) 

*1 cup flour

*1 tbsp melted butter

*1 tsp vanilla extract

*1/3 tsp salt

*oil or butter for cooking

*fillings and toppings of choice

Add all ingredients together in a bowl! 

Mix or whisk until smooth! 

Lightly coat frying pan with oil or butter. 

Depending on the size of your pan and ladle use 3/4 to 1 full scoop of mixture. I used 3/4 at first but moved up to 1 full scoop as my first one was so thin it broke easily. I put my pan on the side then swish the mixture in a circle around the pan until it was even. 


Cook on each side for 1-5 minutes. I cook mine on low to avoid burning and encourage even cooking. So mine take longer. I keep mine warm in the oven while I cook the others as it can take some time to make a batch. 

Use one of these dodads that I can never remember the name of to loosen up the sides as it’s frying. It helps them from crisping up too much and makes it also easier to get a spatula under to flip it. 

Once done you can fill them and roll them up then add toppings! Serve immediately! 
I put homemade nectarine jam in my husbands crepes. Use as little or as much as you please! 

I added a homemade chocolate spread with hand crushed almonds inside two of mine. The third had local raw honey and almonds (it ended up being my favorite one!). 

I topped all of them with butter and powdered sugar! So decadent and delicious! You can use a whipped topping with fresh fruit or a multitude of other toppings and fillings. So many possibilities! Enjoy! 

Maple Cacao Banana Bread Recipe

Banana Bread is a favorite in our house! We even bake it as gifts as we love to experiment with different ingredients we add to our recipes. Share the love! Today, I started with a plan to make chocolate chip banana nut muffins but thought it might be easier to transport a pre-sliced loaf on a walk later today. I wanted something a little different so I looked at our ingredients and saw maple syrup and Droste cacao. Perfect! The maple syrup helps to sweeten the bread as cacao can be bitter. This recipe doesn’t need to include nuts but I added pecans as I love varying textures in my banana bread. This recipe makes two loafs. 

You will need:

*4-6 bananas (2-3 is recommended per loaf)

*3 cups flour

*2 eggs 

*3/4 cups sugar 

*3/4 cups brown sugar 

*1/2 cup melted butter

*1/3 cup maple syrup

*2 tbsp cacao of choice (I used Droste) 

*2 tsp baking soda 

*2 tsp vanilla extract

*1 tsp salt

*optional 1-2 cups of nuts of choice or chocolate chips. 

Pre-heat oven to 350 degrees F. 

Smash up your bananas! I used half frozen bananas I had chopped up when very ripe (the riper the sweeter they will be) and half fresh. 

Start melting butter.

Add dry ingredients.

Add maple syrup!

Add melted butter! 

Mix lightly before continuing.

Add vanilla and then the eggs.

Dump in nuts if you decided to use then!

Mix mix mix! 

Greased two bread tins then pour your bread mixture in. Bake for 1 hour or until fully cooked. 

Let cool for 3-5 minutes then pop out of containers. 

Let cool then enjoy! 

Nectarine Jam Recipe – No Pectin Needed

Jam making is one of my favorite things to do. If I am to be honest I don’t actually care much for fruit except mostly in smoothies it in infusing drinks. I am a savory flavor person and prefer vegetables. Though, fruits are my favorite to work with. The smells and textures in my hands are so invigorating, sensual and beautiful. The variety of color and the scents they release when worked with are intoxicating. Nectarines are known to represent romantic relationships (especially marriages), fertility, abundance, longevity, love, happiness, et cetera. 

My toddler goes through food phases. She seems to eat ANYTHING if we are out or at a friends house but at home she changes her mind on things she will consume. Recently, she went on a nectarine rampage and we bought piles of them. The last few days she seemed to be “over” them so they have sat ripening more and more. I decided instead of leaving them to make jam instead. I only had three left but you can easily double, triple, etc this recipe. 

You will need: 

*3 whole nectarines 

*1 1/2 cups of sugar

*2 teaspoons of lemon juice

*a dash of spice of choice (optional)

Nectarine skin has natural pectin so don’t peel it! If you prefer not to eat the skin then you will need to add pectin to this recipe. 

Wash and chop nectarines! Toss the pits or save them for other uses.

Place into pot and add lemon juice and sugar. You can add your spices now if you wish or during the last 5 minutes. Some prefer to add it later. I used a dash of cinnamon. 

Turn onto medium heat and stir. Cook for 30 minutes and stir every few minutes.

It should look something like this when close to done. 

You can mash it up with a potato masher if you prefer not to have such big chunks (or chop smaller to begin with). I mashed mine as I may use it for a cookie filling. 

If you’re going to can the jam you can proceed as you wish. I won’t be detailing instructions for that this time around. I decided since it is a small batch that I will be using this weekend that I would just let it cool slightly then add to a container.

Do not add steaming hot jam to a cool or room temperature jar! I let mine cool a little then poured. I added the lid immediately and the little bit of heat left sealed it slightly. I then let it cool more on the counter before refrigerating. Enjoy! 

Scottish Tattie (Potato) Scones Recipe

Yesterday, I was talking to a friend who I consider a soul sister about Scottish food (something she’s familiar with). I was asking her about a recipe unrelated to this (which I may share later in the week) but it ended up inspiring me to make Scottish Tattie Scones! Almost like the potato pancakes I am familiar with. They are traditionally (or so I have read) served as part of breakfast alongside other things such as bacon, eggs and other flour or oat based scones. 

You will need: 

*4 Russet Potatoes (I used 5 large red potatoes)

*1/2 cup flour plus extra for shaping, etc

*1/4 stick of room temperature butter (plus more for frying if not using bacon fat or oil of choice)

*1 tsp salt (some may prefer less)

Boil the potatoes until fully cooked! All recipes I have tried say to remove the skins after but I don’t like waste so I keep them. Boiling them in the skins supposedly enhances the potato flavor as well. It also makes the skins easy to remove without a peeler. You can pinch and remove them by hand after draining. 

Remove all water and mash! Having a dry texture is what you want. 

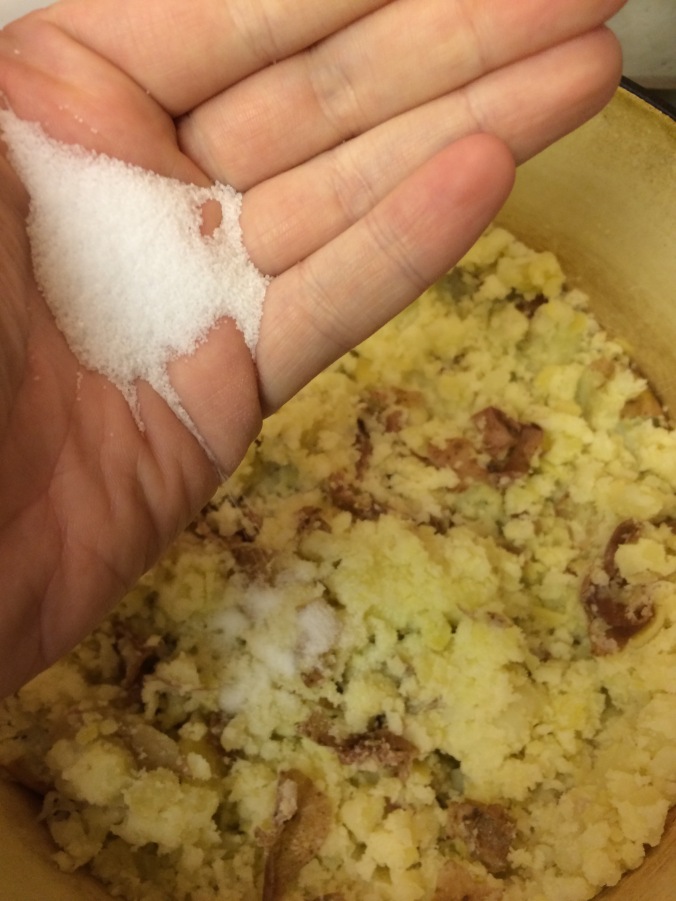
Add salt and butter. I added smoked paprika, dill and black pepper. Most recipes only use salt and butter to flavor however. 

Then add the flour! Mix well.

Flour a surface and drop your mixture onto it. If you need to let it cool more to work with that’s fine! It actually works better cooler as its not releasing heat and getting sticky when rolling out. 

Divide into 4-5 sections. More or less depending on how small you will be making your circles. You can also just roll out everything and use a round cookie cutter to cut out bits. The way I did it is how I see it more commonly done.

Take a section and mold into a ball. Roll in more flour if needed.

Roll out until at least 1/4 of an inch thick. Many are made thinner but I find that too difficult to work with. 

Poke with a fork all over the flattened piece then cut into fourths. 

Prepare griddle with butter or the more popular bacon fat. Mine had tasty leftover juices from chicken I had cooked earlier in it. You’ll want the griddle hot!

Place sections in and fry until golden brown on each side. 

Set on a paper towel or cloth to absorb extra liquids.

Serve hot! The scones can be refried or toasted as a meal later as well and are still delicious! Enjoy! 

Working With Essential Oils For Rosacea 

My whole life I have had pink skin. As a child it was cute. Eternally rosy cheeks and an easily reddened face. When I got older it got more red. Red OVER pink. Then dry patches and random skin issues arose. My mom suspected rosacea. It was never “bad enough” that I wanted to seek help. Instead, I started using lavender to help the redness. It worked decently when using regularly. I used infused oils, water infusions and essential oil from the plant at different times. Using what I had when I had it. Since moving to the Pacific Northwest last Summer from Southern California my skin became more dry. Whereas it was more oily before. Rough patches and redness started to make more of an appearance. Then recently a full rash spread like a trail across my face. I took pictures and immediately sent them to my mom. A nurse with many years experience in dermatology. The next day she confirmed her diagnoses with one of the doctors she works with. It was rosacea. She immediately began researching pregnancy safe medication for me. Whereas I ran to our essential oils. 

I had been neglecting using essential oils on my face for a few months prior to the breakout. I had started infused oils that ended up in baths and simply never got around to making my usual concoction to help my skin with essential oils to make up for it. I was using rose infused jojoba oil as a spot treatment for dry patches but found it too heavy for all over wear for my face (it is perfect for the rest of me though!) but it wasn’t enough. So when my husband found his essential oils by chance shortly after I had more of a confirmation on what was going on it felt like it was all clicking into place on what I needed to do. I grabbed our family oils and his collection (this was before we started buying them together) and headed to the bathroom to get to work.

My easy remedy to ease the redness was lavender essential oil in my light sensitive skin oil free face moisturizer. I use different brands depending on where we are and what is available but I always choose the light formulas for sensitive skin and that generally means oil free as well. Depending on the size of the bottle I would use 5-20 drops and mix well. Leaving overnight to “infuse” the lotion. This time I used lavender, rosemary and my husbands all time favorite helichrysum or “Immortella” oil. I added 5 drops of each as well as 5 drops of my rose infused jojoba oil. The difference is incredible! The first day the rash on my cheek went away along with some redness. A few days later the rash under my bottom lip was gone. A week later and only some redness remained. Less than I have had in probably a year or so. I still have dry spots the size of my 17 month olds pinky nail but I gently exfoliate daily and it’s not bad at all. I also found an activated charcoal cold process soap in the cupboard I began to use after someone I recently met suggested it as shelf full aide. 

Other essential oils for rosacea include: German chamomile, rose geranium (or just geranium), rosewood, tea tree, eucalyptus, thyme and others. Please be sure to always dilute your oils. A 2-5% dilution is generally recommended. Do your research prior to use if pregnant, nursing, taking medication, et cetera. I am only giving advice based off of my own research and experiences and I am not a medical professional. If you use oils on your face I would stay out of direct sunlight and from enduring long sun exposure! 

I’m not saying essential oils cure everything or anything at all. It has just helped me PERSONALLY in taming my symptoms immensely. Rosacea sometimes worsens around age 30 and I’m pregnant and turning 28 this month. Soon I will seek the advice of a medical professional in the case that it may worsen with age. Holistic healing is an amazing thing but we don’t scorn most modern medicine in our house. We use both! A gut friendly diet is also recommended for rosacea as many say it may stem from there. So eat well and do your research! If anything with using oils…at least you’ll smell good!